

Ready to dive into arc welding? Starting your first welding project can feel like staring at a hardware store aisle – overwhelming and full of unknowns. Let’s simplify things. Every successful weld begins with quality gear and smart preparation.
One of the key preparation steps for arc welding is gathering all the necessary tools and equipment in advance to ensure a smooth, efficient, and safe welding process.
Think of your setup as a recipe: miss one ingredient, and the results won’t stick. You’ll need core items like a reliable power source and protective gear. But what about those small-but-mighty accessories? They’re the secret sauce for cleaner joins and safer work in various welding processes.
Costs can pile up fast if you’re not careful. We’ll show you where to invest in welding machines and where to save. Did you know many pros start with basic kits and upgrade later? Smart choices early on mean fewer headaches down the road.
Key Takeaways
- Safety gear is non-negotiable – helmets and gloves come first
- Choose welding machines based on your project types and skill level
- Essential extras like chipping hammers improve results
- Budget-friendly options exist without sacrificing quality
- Proper setup prevents common beginner mistakes
Stick with us to build your toolkit step-by-step. You’ll learn how each piece works together, spot good deals, and avoid overspending. Let’s turn that spark of interest into real welding skills.
Introduction to Arc Welding and Its Importance
Ever wondered how electricity can fuse metal? Arc welding makes this everyday magic possible. This method creates strong bonds by forming an electric arc between your electrode and workpiece. Since 1890, when stick welding first appeared, it’s remained a go-to for DIYers and pros alike.
Understanding the Welding Process and Safety Basics
Here’s what happens when you strike an arc. Electricity jumps through the air gap, creating enough heat to melt metals at 6,500°F. The molten materials mix, then cool into a solid joint. But this fiery dance needs control – that’s where your skills and safety gear come in.
Bright sparks and UV radiation demand protection. Always wear auto-darkening helmets and flame-resistant gloves. Did you know even reflected light can burn your eyes? Proper ventilation matters too – fumes from melted metals aren’t exactly fresh mountain air.
Overview of Tools, Machines, and Accessories
Your setup starts with power machines – transformer-based units work best for beginners. Electrodes act as both heat source and filler material. Chipping hammers clean slag, while wire brushes prep surfaces. Don’t forget clamps – they’re like extra hands holding pieces steady.
Modern welders offer adjustable amps for different metal thicknesses. Some even have “hot start” features to prevent stuck electrodes. These accessories might seem small, but they transform frustrating tries into smooth runs.
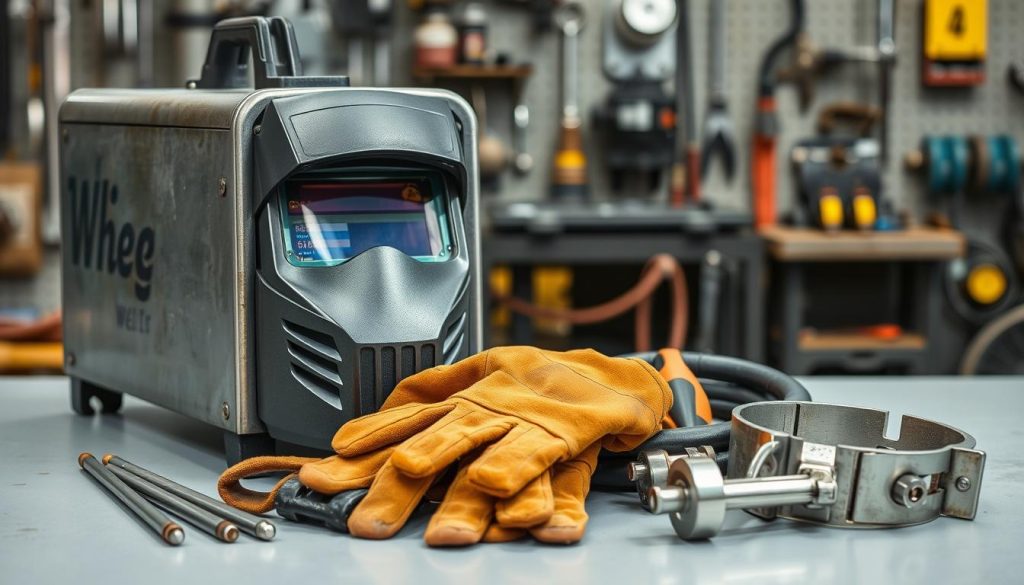
Gathering Necessary Tools and Equipment for Arc Welding
Starting your welding journey? The right gear acts like a trusted partner – it supports your progress and prevents avoidable mistakes. Imagine trying to paint a masterpiece with cracked brushes. That’s what welding feels like without proper tools designed for the job.
Foundations for Success
Quality welding equipment does more than protect you – it shapes your learning curve in the welding process. Cheap electrodes stick to metal surfaces, while poor-quality helmets strain your eyes. These frustrations distract from mastering techniques like welding arc control or bead placement.
Smart starters choose versatile gear for their welding projects. A mid-range welding machine handles multiple projects, from repairing garden tools to crafting metal art. Durable gloves and jackets last through practice sessions and real jobs alike. These essential items become extensions of your hands over time, especially when you get started with tig welding or mig welding.
| Quality Tools | Cheap Alternatives | Impact on Results |
|---|---|---|
| Auto-darkening helmet | Fixed-shade lens | Better visibility, fewer errors |
| Copper-clad electrodes | Basic steel rods | Smoother arcs, cleaner welds |
| Adjustable clamp set | Single-size clamps | Secure holds for odd shapes |
Contractors often provide worksite materials, but personal projects demand careful selection. Need help choosing? Our welding learning resources break down gear options by skill level and project type.
Remember – good tools don’t guarantee perfect welds, but they remove unnecessary hurdles. Like a musician with a tuned instrument, you’ll focus on technique rather than fighting faulty equipment.
Key Welding Machines and Power Sources
What separates hobbyists from pros in welding? Often, it’s understanding your equipment’s strengths. Your welding machine acts like a musical instrument – master its controls, and you’ll create masterpiece joints.
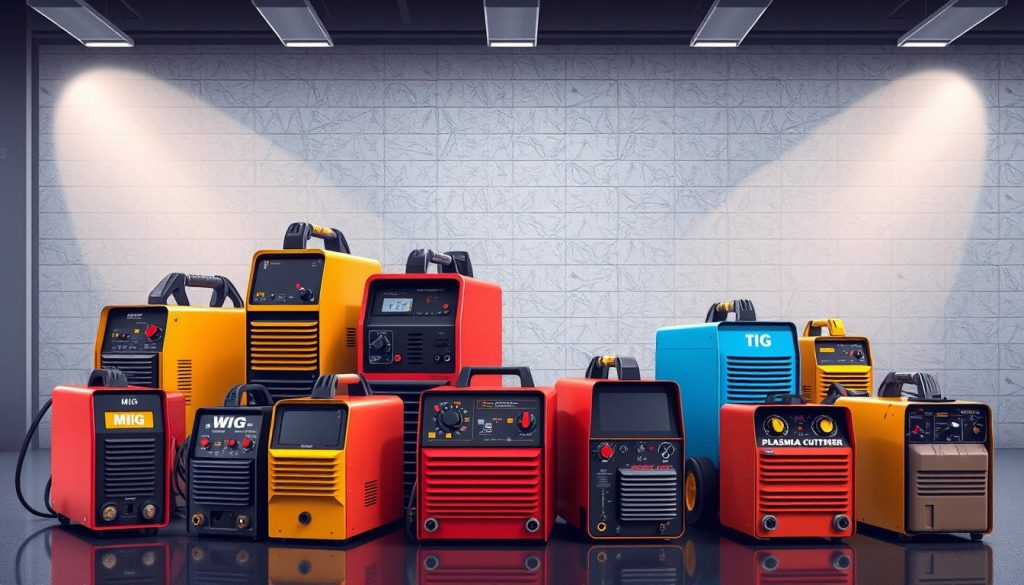
Comparing Stick, MIG, TIG, and Flux-Cored Welders
Each welding machine sings a different tune. Stick welders (SMAW) thrive outdoors – their shielding flux laughs at wind. Perfect for farm repairs or rusty metal. MIG machines? They’re the fast-food drive-thru of the welding process. Push a trigger, get smooth beads. But they hate breezes and need gas tanks.
| Machine Type | Best Use | Skill Level | Cost |
|---|---|---|---|
| Stick | Outdoor welding projects | Beginner-friendly | $ |
| MIG | Indoor fabrication | Easy to learn | $$ |
| TIG | Precision work | Advanced | $$$ |
| Flux-Cored | Thick materials | Intermediate | $$ |
Features and Amperage Considerations
Ever seen a welder panic when metal burns through? That’s amperage mismatch. Thicker metals demand higher amps – like using a firehose instead of a squirt gun. Most welding machines offer adjustable settings, but check their range. A 140-amp unit handles car panels; 200 amps tackles structural steel.
TIG welders need foot pedals for real-time control – like gas and brake in a car. Flux-core units? They’re the camels of welding, storing shielding flux inside the wire. No gas bottles needed. When choosing, ask: Will I weld aluminum? Does portability matter? Our equipment guide dives deeper into these trade-offs.
Remember – the right machine matches your welding projects and growth. Start simple, then expand your toolkit as skills sharpen. After all, even Picasso started with crayons.
Essential Safety Gear for Every Welder
What’s more valuable than your ability to see or move freely? Welding safety gear forms your last line of defense against workplace hazards. Proper protection lets you focus on perfecting your craft rather than dodging sparks.
Protective Apparel: Helmets, Gloves, and Jackets
Auto-darkening helmets do double duty. They shield your eyes from blinding UV rays while letting you position electrodes accurately. Look for models with adjustable shade levels – they adapt to different welding currents instantly.
Leather welding gloves should feel like second skin. Quality pairs offer heat resistance without sacrificing grip. Pair them with flame-resistant jackets – 12-ounce leather or treated cotton works best. These layers stop molten metal from reaching your body during overhead work.
Additional Gear: Ear Protection, Safety Glasses, and Footwear
Safety glasses seem redundant until grinding sparks fly toward your face. ANSI-approved lenses protect during prep work and slag removal. Combine them with earplugs – welding areas often exceed 85 decibels, the threshold for hearing damage.
Steel-toe boots solve two problems. They guard against falling tools while insulating from electrical hazards. Look for slip-resistant soles – workshop floors get slippery with metal shavings and oil.
| Essential Gear | Optional Upgrades | Risk Mitigated |
|---|---|---|
| Basic helmet | Auto-darkening lens | Eye damage |
| Leather gloves | Heat-resistant sleeves | Hand burns |
| Steel-toe boots | Metatarsal guards | Crush injuries |
Your gear choices directly impact your longevity in welding. While budget options exist, never compromise on certified protection for vital areas. After all, medical bills cost more than quality equipment.
Workstation Setup: Welding Tables, Clamps, and Accessories
Ever fought a wobbly metal piece while welding? A stable workstation turns shaky attempts into clean, consistent joints. Your workspace foundation starts with two heroes: a reliable welding table and trusty clamps that lock workpieces in place.
Before using any tools, it’s essential to start by assessing the work area for arc welding to ensure a safe, organized, and hazard-free environment that supports efficient and accurate welding work.
Fixed vs. Portable: Finding Your Table Match
Stationary tables shine in dedicated shops. Their heavy frames handle thick metal plates without budging. Perfect for MIG welding or detailed fabrication. Portable options? They’re the road warriors. Lightweight designs with folding legs make stick welding repairs in tight spaces possible.
Garage hobbyists often choose compact tables with storage shelves. Pros working on-site? They need rolling carts that survive truck beds. Remember – your table should match your most common projects, whether you’re using a welding machine or various materials.
The Clamp Revolution
How many clamps does a project really need? Start with ten. C-clamps grip odd shapes, while magnetic versions snap steel parts into alignment. Locking pliers work wonders for angled joints.
Quality clamps prevent the #1 rookie mistake: warped metal. They hold workpieces tight as heat expands and contracts the material. Combine them with proper equipment setup for workspace efficiency and ensure your protection while welding.
| Table Type | Best For | Space Needed |
|---|---|---|
| Fixed | Precision work | Large shops |
| Portable | On-site repairs | Truck beds |
| Folding | Home garages | Compact areas |
Your accessories decide whether you wrestle metal or command it. A leveled table and strategic clamps let you focus on bead quality – not chasing shifting parts.
Cleaning and Finishing Tools for Superior Welds
What separates a rough weld from a professional finish? Your tools for cleaning matter as much as your welding technique. Proper preparation and post-work cleanup transform splattered joints into smooth, durable connections.
Metal Shaping Champions
An angle grinder acts like a sculptor’s chisel. It removes excess slag and polishes rough edges in seconds. Choose one with variable speeds – delicate aluminum needs gentler treatment than thick steel.
Chipping hammers crack off stubborn slag coatings from stick welds. Their pointed ends dig into crevices without damaging the metal beneath. Pair them with wire brushes that scrub away rust and mill scale before striking an arc.
Battle Against Contaminants
Ever seen bubbles ruin a perfect bead? Contaminants like oil or paint cause that. A stiff-bristle brush scrubs surfaces clean, creating better weld adhesion. For MIG projects, this step is non-negotiable.
Post-weld cleanup matters too. Residual debris weakens joints over time. Keep a vacuum nearby – inhaling metal dust harms lungs more than sparks hurt skin.
Gathering Necessary Tools and Equipment for Arc Welding
| Task | Tool | Result |
|---|---|---|
| Slag removal | Chipping hammer | Smooth surface |
| Rust cleaning | Wire brush | Stronger bonds |
| Edge polishing | Angle grinder | Professional finish |
These tools aren’t just cleanup crew – they’re quality insurance. Spending five minutes prepping metal surfaces saves hours fixing porous welds later. Your future self will thank you when projects hold up for decades.
Specialized Equipment for Different Welding Techniques
Ever struggled to keep metal pieces aligned while welding? The right accessories turn frustration into precision. Each welding process demands specific tools – like using steak knives for butter wouldn’t work.
Gear Specific to Shielded Metal Arc Welding
Stick welding thrives on simplicity. E6010 electrodes bite deep into dirty metal – perfect for outdoor repairs. Their E7018 cousins create smooth beads on high-strength steel. Always match your rod type to the base material’s thickness and composition.
Essential Accessories: Magnets and Measurement Tools
Welding magnets act like third hands. Strong models hold 90° angles for square frames or fire pit grates. Pair them with a speed square – this $10 tool marks perfect 45° cuts faster than guessing. For heavy machinery welding techniques, these helpers prevent costly misalignments.
Don’t overlook filler materials. They bridge gaps in joints, reinforcing weak spots. Aluminum projects need silicon-bronze fillers, while stainless steel requires matching alloys. Your accessories cabinet should mirror your common projects – organized chaos beats frantic searches mid-weld.
FAQ
What safety gear is non-negotiable for arc welding?
Always wear an auto-darkening welding helmet (like Lincoln Electric’s Viking series), flame-resistant gloves, and a leather jacket. Safety glasses under the helmet and steel-toe boots protect against sparks and debris. Don’t skip ear protection—grinding noise can damage hearing over time.
Can I use the same machine for MIG and TIG welding?
Some multi-process welders, like Miller Multimatic 220, handle both. However, TIG requires a foot pedal for amperage control and a gas cylinder. MIG uses a wire feeder. Beginners often start with one process to avoid complexity when using the welding machine.
Why do I need a chipping hammer and wire brush?
These remove slag (the crusty residue on welds) and clean metal surfaces. A chipping hammer breaks off thick slag, while a wire brush preps the workpiece for smoother, stronger welds. Dirty metal leads to weak joints!
Are welding magnets worth buying for small projects?
Absolutely. StrongHold magnets or Hobart’s 4-inch models hold workpieces at perfect angles. They’re lifesavers when clamps can’t reach. Just keep them away from heat—magnets lose strength if overheated.
How do I pick the right amperage for my welder?
Match amperage to metal thickness. For example, 1/8-inch steel needs ~125 amps. Check your welder’s manual—a Forney Easy Weld 140 handles thinner metals, while industrial machines go higher. Too low? The rod sticks. Too high? Burns through metal.
What’s the best way to organize a welding workstation?
Start with a sturdy welding table (like Strong Hand Tools’ Nomad). Use C-clamps or vise grips to secure workpieces. Keep grinders, rods, and filler materials within reach. A fireproof mat under the table prevents accidents. Pro tip: Label storage bins for faster cleanup!
Do I really need a separate angle grinder?
Yes. A DeWalt or Makita angle grinder smooths rough edges, cleans surfaces, and cuts metal. Pair it with flap discs for finishing and zirconia wheels for heavy grinding. Trying to weld over rust or paint? The grinder fixes that first.
How often should I replace welding gloves?
Inspect them weekly. Holes or stiff leather? Time for new ones. Tillman 850s last longer for hobbyists, but pros might burn through a pair monthly. Gloves are cheaper than burns—don’t push their limits!