Types Of Welding Joints
Welding is a crucial manufacturing and fabrication process used across countless industries to join metals and thermoplastics. The effectiveness and strength of any welded joint depend on multiple factors – proper joint design, material considerations, edge preparation, and welding technique.
There are five primary types of welding joints, each with their characteristics, strengths, and applications:
- Butt joints – Connect two pieces of metal end-to-end. Ideal for pipes, tubes, and cylinders.
- Lap joints – Overlapped metal pieces. Versatile for vessels, ductwork, and sheet metal.
- Tee joints – Perpendicular connection of two metals. Used in structural beams and supports.
- Corner joints – Pieces meet at a 90-degree angle. Common in boxes, frames, and L-shaped objects.
- Edge joints – Side-by-side connection. Allows smooth, even welded surface.
Properly designing and executing welds for these joint configurations is vital for creating optimal, long-lasting welded structures. This guide will give welders an in-depth look at joint types, considerations for achieving quality welds, and techniques for specific welding applications and scenarios.

The Five All-Star Welding Joints and How to Use Them
Welding joints are like the intersections and interchanges of the welding world – they connect different pieces in specific configurations to create the needed structures. I think of joints as the secret sauce that makes welding work. Choosing the right joint type and using it properly is crucial for construction, manufacturing, and even art!
Let’s go over the five all-star joints that every welder needs to know:
Butt Joints
Butt joints are heavy hitters in the world of welds. They join two pieces of metal straight on, end-to-end, to form a solid in-line connection. If you imagine two pieces of pipe coming together, that’s a butt joint.
Butt joints are ideal for:
- Joining cylindrical and tubular sections – think railings, bikes, exhaust pipes.
- Applications where strength and sealing are critical – pressure vessel storage tanks.
- Minimizing material waste.
- Structures undergoing tensile stress.
The smooth, even junction has fewer stress concentrators. But we must prepare the edges to ensure full penetration and prevent flaws like incomplete fusion. Common edge preparations include:
- Single bevel-angled edge on one piece.
- Double bevel – both pieces have an angled edge.
- Single V/U/J – different groove shapes in one piece.
Expert welders can adapt the type and angle of edge prep to the materials and application. Now that’s butt joint mastery!
Lap Joints
Lap joints strengthen by overlapping two pieces of metal and welding along the edges. They remind me of a fly’s wings – overlapping and versatile.
Lap joints shine when:
- You need a watertight seal – like with tanks and containers.
- Joining dissimilar metals and material thicknesses.
- Quick welds are needed – minimal edge prep saves time.
- Access is limited for joint preparation.
The overlap also means less penetration is needed. But we have to watch out for potential cracks at the edges. Common lap joint configurations include:
- Parallel – simple overlap.
- Cross-perpendicular overlap.
- T – top piece overlaps a flange.
- Corner – overlap forms an L shape.
With the right fit-up and welding technique, lap joints will give you a strong, leak-proof connection.
Tee Joints
Tee joints are critical in structures and frames, allowing us to connect elements at 90-degree angles. Picture a capital “T” – that’s why they’re called tee joints!
Tee joints bring the heat for:
- Connecting beams, braces, and columns.
- Joining branching pipes and tubing.
- Door and window frames.
- Any 90-degree connection of load-bearing members.
The welds are primarily fillet welds, though we can also use groove welds depending on the joint design. Edge prep helps ensure full penetration into the joint.
Common examples include:
- Basic tee joint – pipe welded into plate.
- Lap tee joint – overlapping plate and tube.
- Stub-in tee joint – stub tube fits into the full pipe.
We get excellent triaxial loading capability with tee joints from a perpendicular weld. Ninety degrees of pure welding power!
Corner Joints
Corner joints are another heavy-hitting component in structural applications. They brace and stabilize box-like constructs, from simple frames to enormous ship hulls!
Corner joints excel at:
- Connecting structural frames and boxes.
- Providing excellent torsional rigidity and strength.
- Joining L-shaped and right-angled parts.
Fillet and groove welds are common, using either lap or butt joint configurations. Edge prep and multiple weld passes ensure sufficient throat thickness and fusion.
Usual corner joint types:
- Flanged corner weld – joining with flanges.
- Oblique joint – angled connection.
- Orthogonal joint – right angle, no bevel.
We meld metals at right angles with corner joints to create sturdy, stable structures. Talk about a square deal!
Edge Joints
Edge joints don’t get as much street cred as other welds, but they play a vital role in seamless fabrication. Think of them as the sleek, subtle supermodel of joints!
Their powers come forth when:
- You need a flush, continuous surface. No ridges or joints.
- Low-profile welds are required for aesthetics and finishing.
- Joining thin-gauge sheet metal or delicate materials.
Edge joints use precise edge prep and welding techniques to prevent distortion and flaws. Weld types include:
- Square groove weld – simple edge weld with filler.
- Flare bevel groove weld – angled edges aid penetration.
- J groove weld – single or double-sided u-groove.
By minimizing distortions and sealing edges, edge joints give us those flawless surfaces we love. Glamorous and geometric perfection!
And there you have it – the five welding joint all-stars! Each has its strengths and tactics for fabricating superior structures. Mastering joints takes time, patience, and practice – but the results are well worth it. Let me know if you have any questions about these powerful welding connectors!
Designing Durable Joints
Creating strong, long-lasting welded joints takes more than just laying down some beads in the joint area. We must consider the materials involved, how the joints are prepped, choosing the right welding process, and achieving full penetration.
I consider those the four tenets of ideal joint design:
Pick the Right Metal and Thickness
Choosing suitable metals for welding is METALlogy 101. The materials’ properties, like melt temperature, thermal conductivity, and reactivity, dictate our options.
Here are some key considerations:
- Carbon steel – versatile and economical, great for many applications. It can be heat treated to increase strength.
- Stainless steel – excellent corrosion resistance and durability. It is more difficult to weld than carbon steel.
- Aluminum alloys – lightweight and strong, ideal for aerospace and transportation. Need experienced welders familiar with these tricky alloys.
- Metal thickness – thicker joints need adequate throat size and penetration. It may require multiple passes or specialized techniques.
Like a true materials science master, we must select metals optimized for the mechanical and environmental needs of the application.
Clean and Shape the Edges
They say cleanliness is next to… weldedness. A clean, well-prepped joint makes all the difference in weld quality.
Effective edge preparation steps include:
- Cleaning – remove paint, rust, grease, etc., through solvents and abrasives.
- Cutting – shear, plasma, laser, waterjet – achieve desired edge shape.
- Beveling – single or double-sided bevels, optimized angle for penetration.
- Gouging – for thick sections, create a groove for deep penetration.
Prepping results in:
- Better fusion and penetration into the joint.
- Reduced distortions from welding stresses.
- Optimized edge shape for the chosen welding process.
Put in the work early through proper shaping, grinding, and cleaning. Your welds will thank you!
Select the Best Welding Process
Choosing the right welding process for the joint ensures efficiency, quality, and proper penetration. Consider factors like:
- Materials – their melt behavior and joint accessibility.
- Joint type and design – some processes handle specific joints better.
- Joint thickness – needs adequate heat input and penetration.
- Welder skill level – their familiarity with the process.
Common pairings include:
- GMAW/MIG is a solid process, especially for thinner materials.
- SMAW/Stick – versatile and portable, good for outdoor work.
- GTAW/TIG is a specialized process but is excellent for exotic alloys.
- FCAW – higher deposition rates help with deep penetration in thick sections.
Achieve Full Penetration
For critical welds, complete penetration through the joint is essential. Partial penetration can severely undermine strength.
Some tips for full weld penetration:
- Optimize edge prep and groove design for penetration needs.
- Use the correct torch angles and positions based on joint type.
- Adjust amperage levels and welding speed as needed.
- Use proper filler metals to reach optimal melt temperatures.
- Employ multiple weld passes on thick joints.
Assessing joint penetration through non-destructive testing verifies fusion quality. Become a full penetration fanatic for durable, optimally fused welds!
Proper materials, preparation, process, and penetration. Follow those four tenets, and you’ll design and fabricate superior joints.
Maximizing Joint Muscle – Flawless Welds
We’ve covered the different types of joints and how to design them properly. But how do we maximize their strength and performance in the real world? Let’s go over some vital tactics for optimizing joint integrity.
Defeat Defects
Welding defects are joint integrity’s worst enemy. Flaws like porosity, undercut, and cracking create weak points prone to failure. Let’s bust those bugs!
Strategies for defeating defects:
- Maintain correct torch angles, speed, and positions for the joint type. No shortcuts!
- Use enough filler metal to fill the joint, but not excessively. Moderation is key.
- Adjust amperage levels to reach optimal penetration and avoid burn-through.
- Ensure joint surfaces are clean and free of contaminants like paint or grease.
- Apply post-weld treatments like peening to relieve stress.
Stay vigilant on joint fit-up, welding technique, and parameters. Keep those defects at bay for stronger joints!
Deal with Distortion
Welding inherently generates a lot of localized heating and cooling. This leads to distortion issues like warping and residual stresses. Let’s smash those deformations!
Tactics for dealing with distortion:
- Use thinner/smaller welds when possible – less heat input and warping.
- Minimize clamping constraints to allow some movement as the joint cools.
- Plan the welding sequence to balance heat input side-to-side and around the joint.
- Allow gradual cool down of welds by wrapping them in thermal blankets.
- Perform stress-relieving heat treatment after welding to reduce residuals.
With care and know-how, we can outsmart distortion forces and keep joints flat, straight, and happy!
Detect Defects
How can we verify joint integrity and catch flaws that aren’t visible? Non-destructive testing (NDT) to the rescue!
NDT methods commonly used on welds:
- Visual inspection – simple and fast, can catch obvious surface defects.
- Penetrant testing – detects hidden cracks and pores using dye agents.
- Magnetic testing – uses magnetic fields to find discontinuities.
- Radiography – X-ray images reveal hidden internal flaws.
- Ultrasonic testing – sound waves identify defects and measure thickness.
NDT ensures the joint’s insides are as sound as its outsides. Critical reassurance before the job commences!
Follow those three guidelines to maximize the muscle and performance of your all-important welding joints. May your welds be strong, defect-free, and distortionless! Let me know if you need any advice specific to your project – I’m always here to help guide you to welding success!
Welding Like a Contortionist – Positions and Access
Performing welds is like yoga – sometimes, you must twist and contort yourself into odd poses! Welding position and accessibility are key factors in fabrication. Let’s bend over backward together and discuss it.
Flat Position
The flat or 1F/1G position is the most straightforward – like lying comfortably. Gravity isn’t fighting you, so controlling the weld puddle and achieving good penetration is easiest. Ideal for beginners!
Vertical Position
Vertical up 2F or vertical down 2G are intermediate poses. As the tree poses in yoga, maintaining balance is trickier. The weld puddle wants to drizzle downward, thanks to gravity. Take it slow and brace yourself!
Overhead Position
The overhead or 4F position is the headstand of welding – extremely difficult and requires expert skill. The weld pool wants to rain down forcefully. Special techniques for puddle control are a must! Don’t try this one without proper training.
Accessibility
Can you even access the joint for welding? Like a twisting eagle pose, getting into odd angles may be necessary. Consider creative fixturing solutions and tool configurations. Yogis and welders alike must master flexibility!
Let me know if you need any tips on mastering these unusual welding poses. We’ll have you bending like a pro!
Inspecting Your Joints – Testing for Flaws
Alright, we ground and welded our joint successfully! Can we call it a day? Not yet – we need to inspect and test that sucker first. Even the most talented welder can miss flaws lurking beneath the surface. Let’s peer inside the joint!
Visually Scanning
First, visually scrutinize that joint- get close and examine it from all angles. Can you spot any surface defects like cracks, undercut, or porosity? Use good lighting and magnification if needed. The aforementioned eagle eye is key.
Penetrating Dyes
Penetrant testing employs fluorescent or colored dyes to detect hidden cracks and pores that are open to the surface. The dye seeps in and helps highlight the flaws. It’s a pretty slick trick!
Probing Ultrasounds
In ultrasonic testing, sound waves are transmitted into the joint and reflected from flaws or interfaces. It’s like echolocation – listening closely to uncover hidden issues. You can even estimate thickness and depth with UT.
X-Ray Visions
Finally, radiographic testing uses X-ray or gamma radiation to create images of the joint’s internal structure. Welds can hide lots of evils inside – X-rays expose all!
Thorough testing ensures our joints are sound, durable, and ready for action. Take time to peer inside before sending your welds out into the world!
Where Do We See These Joints? – Weld Spotting
Now that we know all about joints, what do we use them for? Welded joints are found everywhere once you know what to look for. Let’s go weld spotting and explore some key applications!
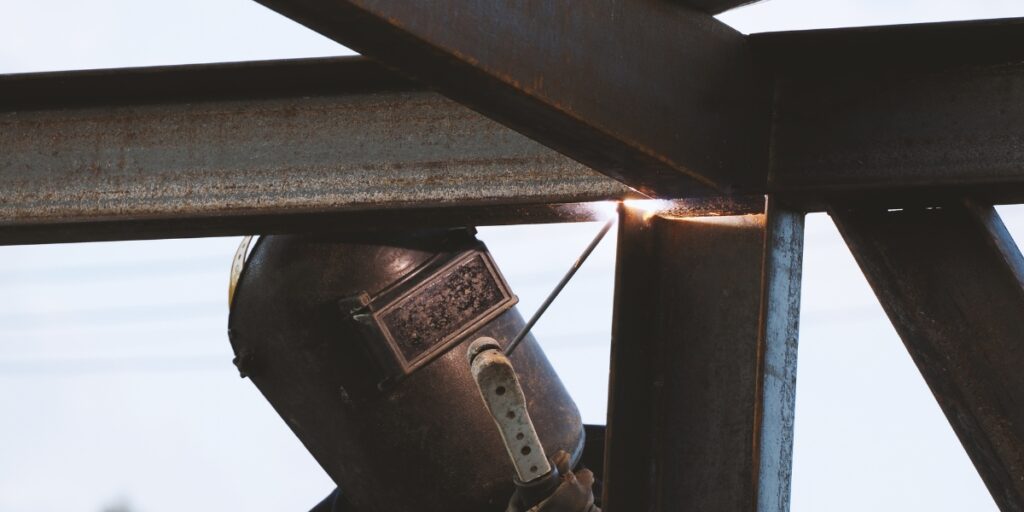
Buildings and Infrastructure – Structural Steel Spotting
Look around any city skyline – what do you see? Steel! Buildings and bridges are made from huge welded structural steel shapes. Butt joints, tee joints, and corner joints are crucial for assembling girders, columns, and bracing. Civil engineering depends on welding mastery!
Transportation – Vehicle Spotting
Check out trucks, railcars, ships, and planes – welds everywhere! From the body panels to the frame and structural components, these complex machines involve tons of lap joints, butt joints, and fillet welds. Even exotic alloys get welded using specialized techniques. Transportation takes welding seriously!
Manufacturing – Factory Spotting
Peek inside factories, and you’ll find welded assemblies everywhere – piping systems, tanks, pressure vessels, machinery housings, robots, and more. Edge joints provide sleek appearances, while robust corner joints brace heavy components. Manufacturing can’t function without advanced welding!